Goblets

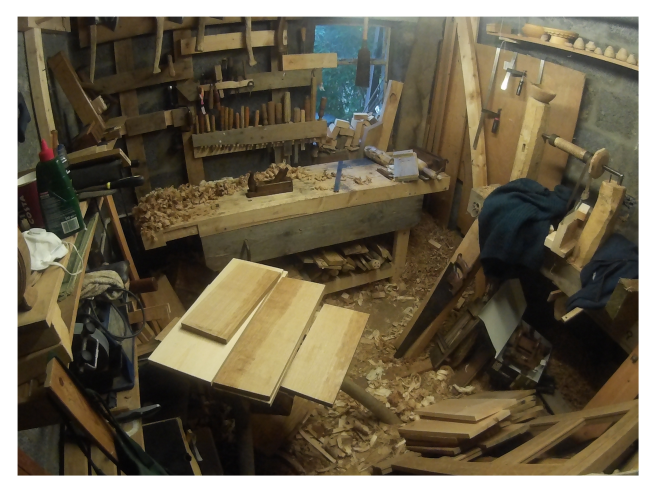
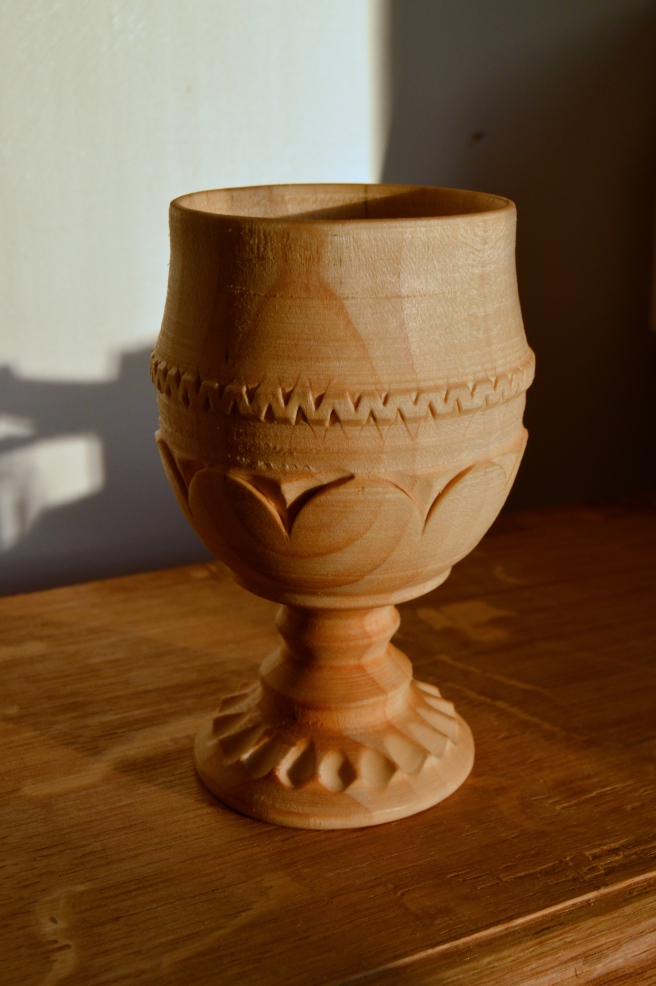
Every two years the Worshipful Company of Turners has put on a big wood turning exhibition at the Carpenters Hall, London. Along with the exhibition they run a range of different wood turning competitions including a pole-lathe turning category. The brief was to turn a decorated goblet this year and I was delighted to see that one of the goblets I turned won first prize in the category.
DSC_0145.JPG
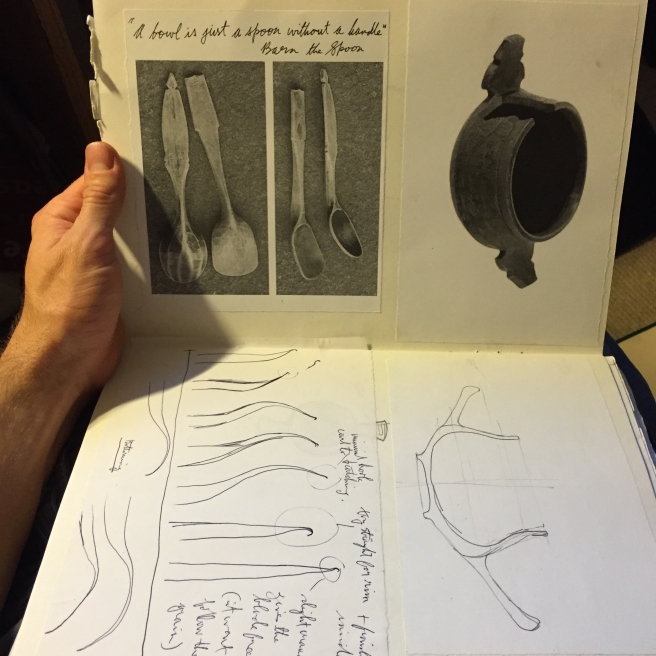
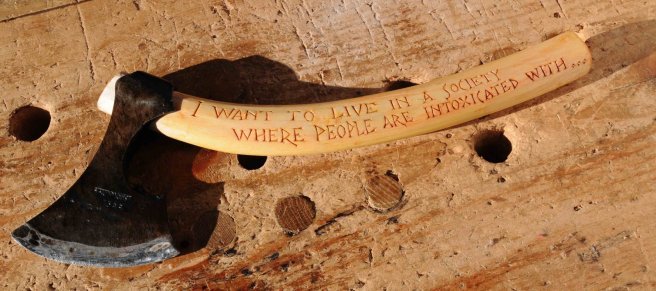
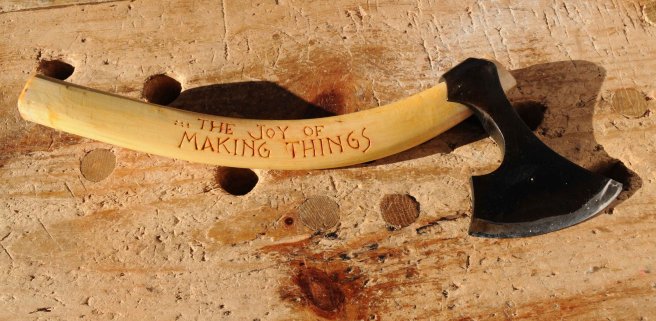
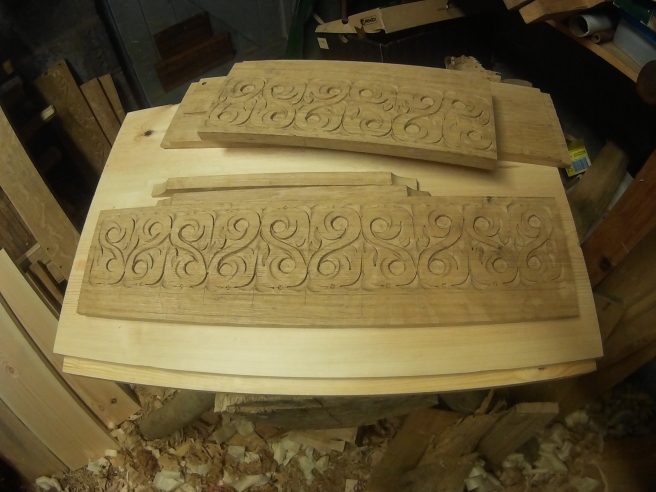
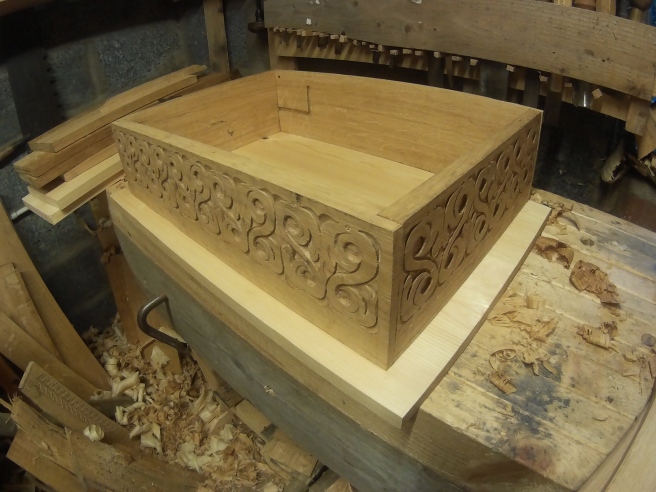
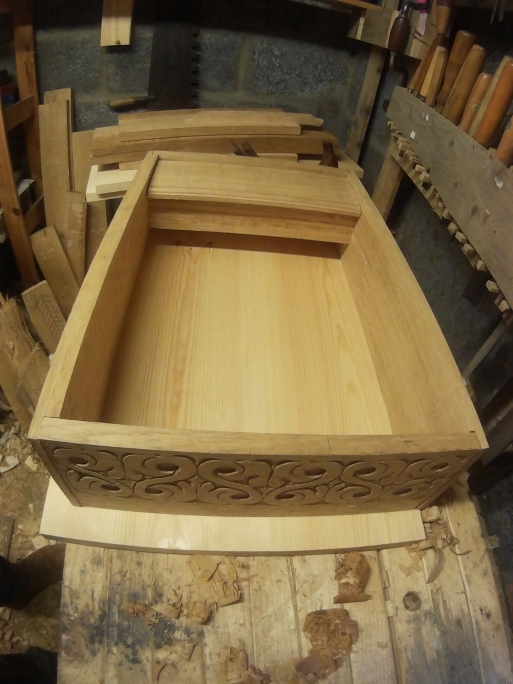
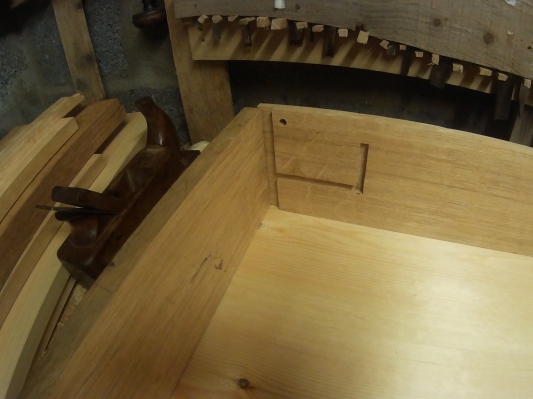
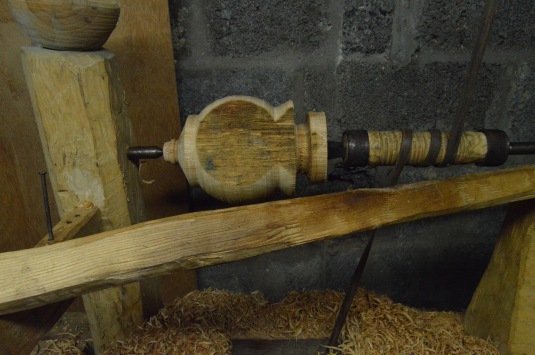
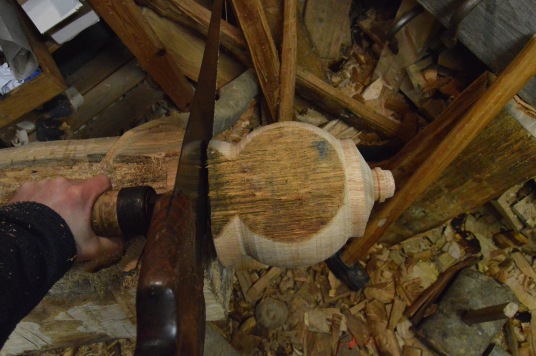
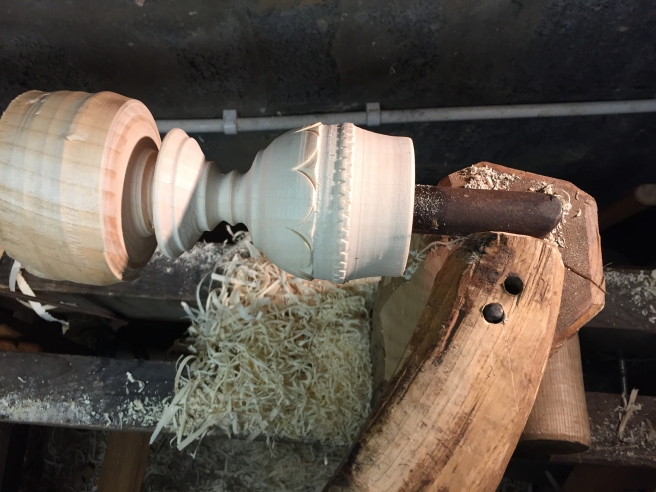
Goblets are not something I have been particularly interested in turning in the past. However I have found that it helps to be given a specific narrow task, forcing me to change pace or direction with the stuff I am making. I developed two main things as I prepared for this competition – a new technique and lathe set-up for end grain hollowing on the pole lathe, and the application of some simple carving techniques to decorate the outer surfaces. It was really nice to pick up the same gouges I have used for carving patterns on boxes and chop into the goblet with them to create simple decoration. More importantly though it has got me working on drinking vessels again for the first time in years.
img_1107
The carving is added before the goblet is hollowed so that it has the strength to withstand the chisel strikes.
In my most recent research I came across a group of turned vessels that seem to have been fairly common in France, Switzerland, and Northern Spain. Essentially they are all wooden goblets that probably mimic glass forms and were used for drinking wine. In northern Spain they seem to accompany the big turned wine jugs, which Asturian turner Arturo Iglesias Martínez is now making. I need to do a bit more digging and translating before I write a proper post about these.
The push to make end grain goblets also brings eastern aesthetics to mind, with additional inspiration coming from my recent trip to South Korea. They have a long tradition of turned wooden bowls, cups, plates, trays etc. used for serving food and tea. I am hoping to tap into some of that rich vein of forms and functions in the coming weeks on the lathe.
To top it off I had a fresh look at the old Irish drinking vessels, lamhogs and methers, in the National Museum of Ireland. Supposedly they have quite a few in storage that I must go look at.
Side profiles of turned drinking vessels constantly swirl around in my head with more material in my imagination than I will ever manage to produce on the lathe. Oh well.

Old notebooks and not enough time in the day

I’ve been going back over some old notebooks recently and came across this page. The quote over the image of Fritiof’s spoons reads “a bowl is just a spoon without a handle”.

IMG_0608.jpg

I remember when I first met Barn the Spoon in Abney Park Cemetery, probably almost 7 years ago now. That’s when he admonished me, via the quote above, for wanting to make bowls on a pole lathe. We were both trying to make medieval style eating spoons at the time and exchanged notes, although he was certainly taking a much closer look than me. He was making a lot of spoons at the time, street selling and camping his way around the country. Of course Barn has since gone on to many amazing spoon carving achievements and done great things for the whole scene in the UK. Not least his role in establishing spoonfest with Robin Wood and co. This year I made it to spoonfest for the 3rd time and was even lucky enough to do a course with Barn. I don’t have the time to to a full spoonfest blog post, but all I will say is it was great craic. After missing it the last two years I was delighted to be able to make a return, met lots of great people and caught up with old friends. Just sorry I didn’t get around to talking to everyone.

Ahead of Edale I had a brief episode of spoon carving, the first in about 18 months, to at least be somewhat prepared. I took a few photos of the process:

DSC_0648
Birch spoon blank with the bowl marked out
DSC_0650
Thespoon bowl follows a gentle crook in the wood allowing the grain to follow the direction of the spoon bowl
DSC_0672
The same blank after axing
DSC_0671
Axe facets on the back of the blank
DSC_0670
Side profile demonstrating the curved grain
DSC_0871
The completed spoon in an oak eating bowl

I was glad I had done this bit of carving as I managed to sell two of the six spoons I brought, which paid for my bus ticket. I do love making spoons but when I first started green woodwork I made tonnes to sell and got a bit sick of them. Going back to spoonfest and seeing all the amazing work that people are doing now has been a great inspiration and motivation to start making a few spoons again more regularly. I also returned to my favourite spoons (mostly Fritiof Runhall’s) in Robin Wood’s collection that he kindly puts out on display for the weekend. While there I felt ashamed that I don’t own more from different makers, but when I returned home and checked the kitchen I realised I did at least have a few. I will definitely be building on this little collection now!

IMG_0633.jpg
From left to right: Ingo Dyrkton, Fred Livesay (the new addition), Barn, Dietrich Staemmler, Sharif Adams

Carving spoons was really the gateway drug into green woodwork for me, and my enthusiasm for them has fully returned. In reality it is mostly down to the people I have met along the way that I am motivated to keep doing woodwork and that only started to dawn on me properly at spoonfest.

My final thought for this blog post is stimulated by a poem Iorwerth Peate included in his 1933 paper titled “Welsh Folk Industries” (also containing a lovely photo of a pole lathe turner that I have inserted below). The world would be a better place if we made more stuff, furnishing our lives and environment directly with the products of our own hands.

Screen Shot 2016-08-23 at 22.10.26.png

Some beautiful images are conjured in this odd poem:

There is no point in work
unless it absorbs you
like an absorbing game.

If it doesn’t absorb you
if it’s never any fun,
don’t do it.

When a man goes out to work
he is alive like a tree in spring,
he is living, not merely working.

When the hindus weave thin wool into long, long lengths of stuff
with their thin dark hands and their wide dark eyes and their still souls absorbed
they are like slender trees putting forth leaves, a long white web of living leaf,
the tissue they weave,
and they clothe themselves in white as a tree clothes itself in its own foliage,
As with cloth, so with houses, ships, shoes, wagons or cups or loaves.

Men might put them forth as a snail its shell, as a bird that leans its breast against its nest, to make it round,
As the turnip models its round root, as the bush makes its own flowers and gooseberries, putting them forth, not manufacturing them,
And cities might be as once they were, bowers grown out from the busy bodies of people’
And so it will be again, men will smash the machines.

At last, for the sake of clothing himself in his own leaf-like cloth tissued from his life,
and dwelling in his own bowery house, like a beaver’s nibbled mansion
And drinking from cups that came off his fingers like flowers off their five-fold stem,
he will cancel the machines we have got.

D H Lawrence 1885-1930

anthologised in ‘A Book of Comfort‘ by Elizabeth Goudge, Fontana 1968


A box completed at last

Box bits have been cluttering my shed for ages, so I was delighted to finally nail them together and get rid of one of them into the house.


I made a short time lapse of the carving of the box sides, which were lined up side by side. Now that I am familiar with the pattern I will be able to carve all three sides at once. This is very fast and efficient as the chisel cuts in the design repeat very regularly.

Looking at the box the carving stands out as the main element. However, the rest of the construction is very time consuming and fiddly when you’re as disorganised as me. When using wood directly from a split green log there is a lot of work in preparing the stock for each individual plank. Most of the boards in the till were planed down from scrap pieces covered in practice carvings.

The wide sawn pine boards for the lid and base also have to be flattened and their edges shaped. Cleats nailed to the boards help reduce movement in them. In this case they also attach the lid to the box hinges (pegs projecting from the back board). The only holding devices I have on the whole bench are holdfasts and the planning stop. Happening across a Chris Schwarz post, which refers back to an earlier one from Richard Maguire (sorry lads can’t find the links) detailing a kind of wood pincher board, was very well timed and a big help. This little trick essentially removes any vague need I thought I had for a tail vice. I like that my bench is basically a block of wood with some holes in it and I plan to keep it that way until a job absolutely necessitates new bench appendages.

5-DSC_0386

Lastly, photos of the finished box. I rarely try and take good quality pictures of my work so I took a few extra ones of other turned work that was to hand while I was at it.

This slideshow requires JavaScript.

Hungary part 2

01-DSC_0324photoGyenesTamas
The village gossip spot on Szentszög or Saints Corner

Just before leaving I asked Tamás about the decoration of the big chest he was working on, as it had to be finished for a customer within a few days. He will take some careful time and thought over the carvings, which are executed freehand, or with straight line and compass, but otherwise done freely and from memory. They carry complex meaning relating to both faith and culture and discussion of this makes up a large portion of the first book he published. It is essential for Tamás to get them right. Since I left he forwarded me photos of the completed decoration.

20-IMG_0531_photoGyenesTamas
The chest Tamás completed during my visit painted and ready for decoration
IMG_0746_photoGyenesTamas
Decoration complete

IMG_0705_photoGyenesTamas

Digressing from chests briefly, as promised I wanted to give a little insight into a couple of other things. Tamás has contributed to the construction of many little monuments in his village, all carrying symbolic and religious significance to him, his family, and the community.
09-IMG_9103photoGyenesTamas
Overlooking the Gyenes home

08-IMG_0362photoGyenesTamas

 Thanks to Agi this oven was an endless source of delicious Hungarian baked treats.
In experiencing a snippet of the Gyenes lifestyle and beliefs, the strongest impression left on me was the reminder to take joy in the simple pleasures of working with wood. Tamás looks with a kind of childlike sense of enchantment and wonderment at the wood and his tools. Making the finishing cuts on a freshly hewn plank is something savoured with zeal, and as I mentioned in my previous post work often stops to admire a good shaving. Pauses to appraise the work and bask in the completion of little tasks were incorporated throughout the day during my visit (although I now Tamas works at high speed when I’m not getting in the way). Partially completed chests, multiple planks and chunks of beech, and many tools sit on beds of shavings in the house to be studied and meditated upon after the hard work finished each day.
One could look at my view of all this as idealistic, or romanticising work that was once, and still is for Tamás, hard labour done at a fast pace under pressure to complete work and make a living. In the past it was carried out by rural people often in the toughest conditions. But I wonder if the woodworker of old paused to cradle a shaving and spend a few seconds staring at it with satisfaction, or took pleasure in the sound of a sweetly cutting tool. Surely they did. For each individual the context may be very different, but that experience in the joy of making things must be common across time and independent of motivation. It was a coincidence that as I came back online after being away and my mind was full of these things I saw this quote of Bill Coperthwaite’s carved into an axe handle by Peter Follansbee. A nice thought.
I hope he doesn’t mind me taking these pictures of his available here: https://pfollansbee.wordpress.com/2016/07/06/inspired/
17-axe-recto_photoFollansbee
Photograph: Peter Follansbee
18-axe-verso_photoFollansbee
Photograph: Peter Follansbee


Hungary part 1

I am waiting for a flight back to London from Hungary after being totally absorbed in a different world for five days and am trying to type this up quickly while thoughts are fresh. There will be more in future posts, this will do for now.
27-IMG_0113_photoTamasGyenes
The Gyenes home and workshop.

Still at a very early stage on my journey into woodwork, for various reasons I have moved ahead in fits and starts, following multiple threads. Things have often happened in short intense bursts of productivity depending on the circumstances. Sometimes I have to engineer these circumstances by booking myself on a course or going off on some kind of journey. These past five days have been a typical example, although I have a feeling I will be able to keep the momentum gained up for a fair while longer than usual.

In this case Gyenes Tamás kindly gave me the chance to work with him at his home in Hungary on riven beech chests he is building, and allowed me an insight into his research work on the riven chests of the Pannonian basin. I think people already know about him, and if they don’t there is information on Peter Follansbee’s blog and of course Tamás’s own website. He is a master of his craft and has researched it widely and in great detail. I feel very privileged to have been given the opportunity and only hope I can provide an accurate impression of his work and outlook on life as a craftsperson.
untitled-attachment-02338_photoTamasGyenes.jpg
Prize winning chests.
Tamás eats, sleeps, and breathes his work, with his wife Ági supporting everything he does. Their beautiful home is a restored peasant house, with clay walls and floors, stacked full of craft work, including a lot of wooden chests and tools, old and new. Inside this house, and the surrounding sheds and workshop, Tamas splits, hews and drawknives green beech to make his trademark Palóc style chests. He also examines and restores old chests there as part of his ongoing research into the craft. Here is a beech chest partially deconstructed:
I worked on a miniature chest with Tamás’s help and at times he worked alone on a big chest allowing me to observe. The basic process for making a new chest are laid out in the following photos. One thing to bear in mind: there is no plane, no workbench, no marking gauge, no try square, no ruler used, only a little story stick with a few guide measurements. “By eye is good enough” seems to be one of his favourite phrases.
Splitting:
Hewing:
Shaving:
Grooving:
Boring:
21-DSC_0230_photoTamasGyenes
A razor sharp tool is necessary for clean boring in the green beech.


Finally all pegged together:
1-IMG_0366_photoTamasGyenes
Chests seeing daylight for the first time.
Enough photos. I am planning a second post attempting to convey the Gyenes’s outlook on life and their craft and culture. This is much harder to write and more important, so will likely take some time to put together coherently.
As for details on his research or specifics on the construction of the chests, I will leave that all for Tamás to describe in the future, so don’t ask me. If anyone is going to write about it in greater detail, it will be Tamás. For now I aim to go on faithfully practicing and researching the different green woodwork threads I am following, now including these riven chests. I will continue to reference, and let myself be guided by, the work of the craftspeople I most admire such as Tamás. Currently this equates to trying to finish two carved oak boxes and a chest, turning assorted products on the pole lathe from a massive load of green wood that was delivered last week, making some spoons to pretend I’m a spoon carver ahead of spoonfest, and now also forging a groover, making a new drawhorse, and starting on some Hungarian riven chests!
23-DSC_0272_photoTamasGyenes

Strapwork day 2

Against the odds I managed to get in the shed for a second day in a row today and advance on the carving from the practice runs yesterday. This time I was working on the front board of a big box and it is the very last bit of oak I have left until I buy another tree. So I was twoing and froing lots before finally striking some chisels into it today.

I was able to adapt the practice carvings from yesterday directly onto the board, using them as a reference as I went. Here are a series of photo’s showing how the layout advanced. After initially being terrified of making a mistake and going very slowly, I started to get a feel for the repetition in the pattern and it flowed smoothly. I can imagine back in the day these were made at high speed.

After everything is struck out with the chisels the last task is to remove all the background. That is when the whole pattern comes alive. It is ridiculous it has taken me a year since going on the course with Peter Follansbee to do this but better late than never. I am massively indebted to him for the way he has made this woodwork accessible to amateurs like me.

DSC_0085


Strapwork

Today was my first go carving some patterns I am a big fan of. At first glance they look complicated, then on inspection you realise they are quite easy to lay out and cut, only to mess them up a lot when trying to do them for real. I have four really nice wide oak boards that are going to make another box and I intend to cover them in this strapwork. I knew I would struggle to cut these right first time though so planed off some old carvings from a board to do a practice run on today. I am determined to get the hang of these, from what I can gather once you get the basic pattern and layout you can play with the design a lot and it becomes very versatile.

I don’t want to post pictures belonging to anyone else so please have a look at Peter Follnsbee’s article about this design to see the real deal:

https://pfollansbee.wordpress.com/2013/02/08/strapwork-carving-designs/

For me spacing the pattern out has been the main difficulty. Because the whole pattern is laid out based on the curves of the chisels struck into the wood, rather than the free cuts of a v-tool, you are somewhat limited by the chisels themselves. I did try to pick Peter Follansbee’s brain about these when I went on his course last year, and his main bit of advice was “start in the centre and work your way out, it’s real simple”. After a false start and re-planing the board down, I eventually got to this point (in the photo below). I started at the centreline of the board, and then worked my way out creating sections based on the diameter of the arches at the top and bottom of each section. This seems to be the key dimension in determining the layout, although it is never actually measured, just laid out on the wood one chisel strike after the next. Once the width of the first arch was defined, I marked out a series of vertical lines to section off all the rest of the pattern out to the board ends.

DSC_0034

Once I had got the hang of striking out the pattern in the wood I practiced some bits that were not working so well, and removed some of the background. So this looks like a real mess in the end but hopefully I will be able to avoid the same mistakes on the finished piece now that it is clearer in my head.

DSC_0038

Trenails

To me this is magic, I love techniques that bind wood together without the need for any other material. There are many different ‘aha’ moments one has when meandering through the vast world of green woodwork and one such moment was seeing and understanding a draw bore mortise and tenon joint for the first time. Here are some oak trenails holding together a coffee table frame I recently made:

A box a year

beemster_meer
I am almost ready to nail together another oak box. This will be my first with a till, an internal lidded box within the box. However as soon as I pulled the carved front and sides out from under a pile of other scraps a couple of weeks ago I immediately realised I would need to fill in the gap at the bottom of the carving. It is so long since I carved the main portion that I had forgotten my reasoning for leaving the gap, it would have been very easy for me to just make the scroll pattern tall enough to fill the space. In any case the gap exists and I want to fill, in this case I’m going to try a very simple pattern. Unfortunately I don’t have the right chisel for the job so will have to buy one before finally nailing this box together. It is frustrating not to have the right tools at hand but I have always tried to be strict with myself and only buy or make tools for jobs as the need presents itself. I struggle with the temptation to waste money on tools on a weekly basis and barely manage to stifle the urges most of the time. A long time ago when I got my first three carving chisels from a lovely family in De Beemster my father warned me not to be in a rush to add a multitude of fancy chisels to the collection but instead patiently build it based on need.
It turned out to be another 10 years before I started to grow the collection but I did not forget the original advice. In any case, out of necessity I have been forced to limit my tools to those that I could transport over and back from London to Ireland so there has been a constant sifting process. For instance I have only ever had one cheap spoon carving hook knife and one straight carving knife for the last six years, and my Gransfors Bruks carving axe was my only one until I started to hew green oak. Now that I have a few more axes, chisels, a bunch of planes and other paraphernalia associated with my bench woodwork I am not sure how I feel about the extra volume of tools, which has stemmed from having a fixed workshop. Note the clutter:
Untitled.png
Lately I have been greatly inspired by this old video that has circulated, and the work of Tamas Gyenes that Peter Follansbee highlighted on his blog (thanks). One aspect in particular that has inspired me is the absence of a fancy workshop or myriad of tools. Such has been the inspiration that I am setting off next week to visit Tamas in Hungary and spend some time learning how he makes his green beech chests. I’m hoping to keep the blog updated with reports from that experience. In the meantime here are some photo’s of the latest box, nearly a year since I started making it. Apologies for the poor quality and weird wide angle lens, my usual camera is not working at the moment.
CAMERA

CAMERA

CAMERA
The till in position
CAMERA
Some of the joinery and grooves for the till and hole for the lid- very basic stuff
CAMERA
Fitting the 3 till parts in
CAMERA
The scratch stock used to create a moulding on the till lid

More flask details

A quick update on another style of flask I’ve been making, this one much more closely replicating the style of the Romanian turner filmed by Stuart King: https://www.youtube.com/watch?v=XEibt31OlCA

These two photo’s show the overall shape being turned on the first axis, then the mandrel being sawn off. It is then repositioned perpendicular to the face of the flask where the opening for hollowing is located.

DSC_0983DSC_0992

Turning on the second axis mainly concerns the hollowing, this flask is a smaller diameter but much deeper form than the last one I made.

You can see exactly where the wood for the flask came from below. It is sitting on top of the 1/16th section of the oak log it came from. It’s a tight fit to make the most of the wood. The back of this flask will have a facet left from the original surface of the split wedge of oak, the marks from the mandrel tangs will get carved away.

Seeing this picture of a window in Reginald’s Tower makes me wonder how many medieval travellers passed through Waterford with a wooden flask at their side? I wonder did one of the many pole lathe turners Waterford had in its past ever make flasks?